
Now it’s time to dust off your Lego skills, you will need them to build your cheap computer. The hard part of building computers is collecting the various computer parts. Putting the machine together is easy. In fact, you’ll be amazed how simple it is.
Before you start working on your motherboard it is very important that you discharge any static electricity that might have build up on your body. Tough some bare metal, preferably something grounded (AND NOT CONNECTED TO THE MAINS). Then get your motherboard out of its antistatic bag. You will see something similar to the picture.
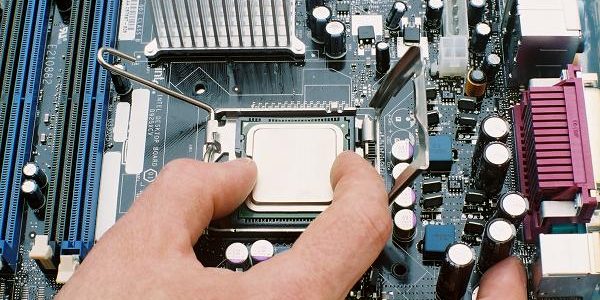
1.The installation of the CPU
It’s a good idea to get the CPU in its socket before you put the motherboard in its case. You will have more room to work that way.
2. Installation of the memory chips.
After you installed the CPU you are ready for the memory chips.
3. Installation in the computer case
After you have to CPU and memory installed we are going to get the hard- and floppy drives, DVD and motherboard in the computer case.
4. Connecting the hard-drives.
In this section, we are going to put you computers long-term memory online.
5. Installation of the expansion boards.
Almost done. We are going install your expansion boards, and after that, we are ready for a first test drive of your new system.
Congratulations! you are almost done. The only thing left to do is to check all the wiring. Then connect the power cord and flip the power switch.
Use your motherboard’s manual to configure your BIOS settings and after saving switch your computer off. Insert the CD into your operating system, and when all is well you will see the opening screen.
If not….. You will have to do some troubleshooting. Go over the above steps again and figure out what was wrong.
Enjoy your new system!